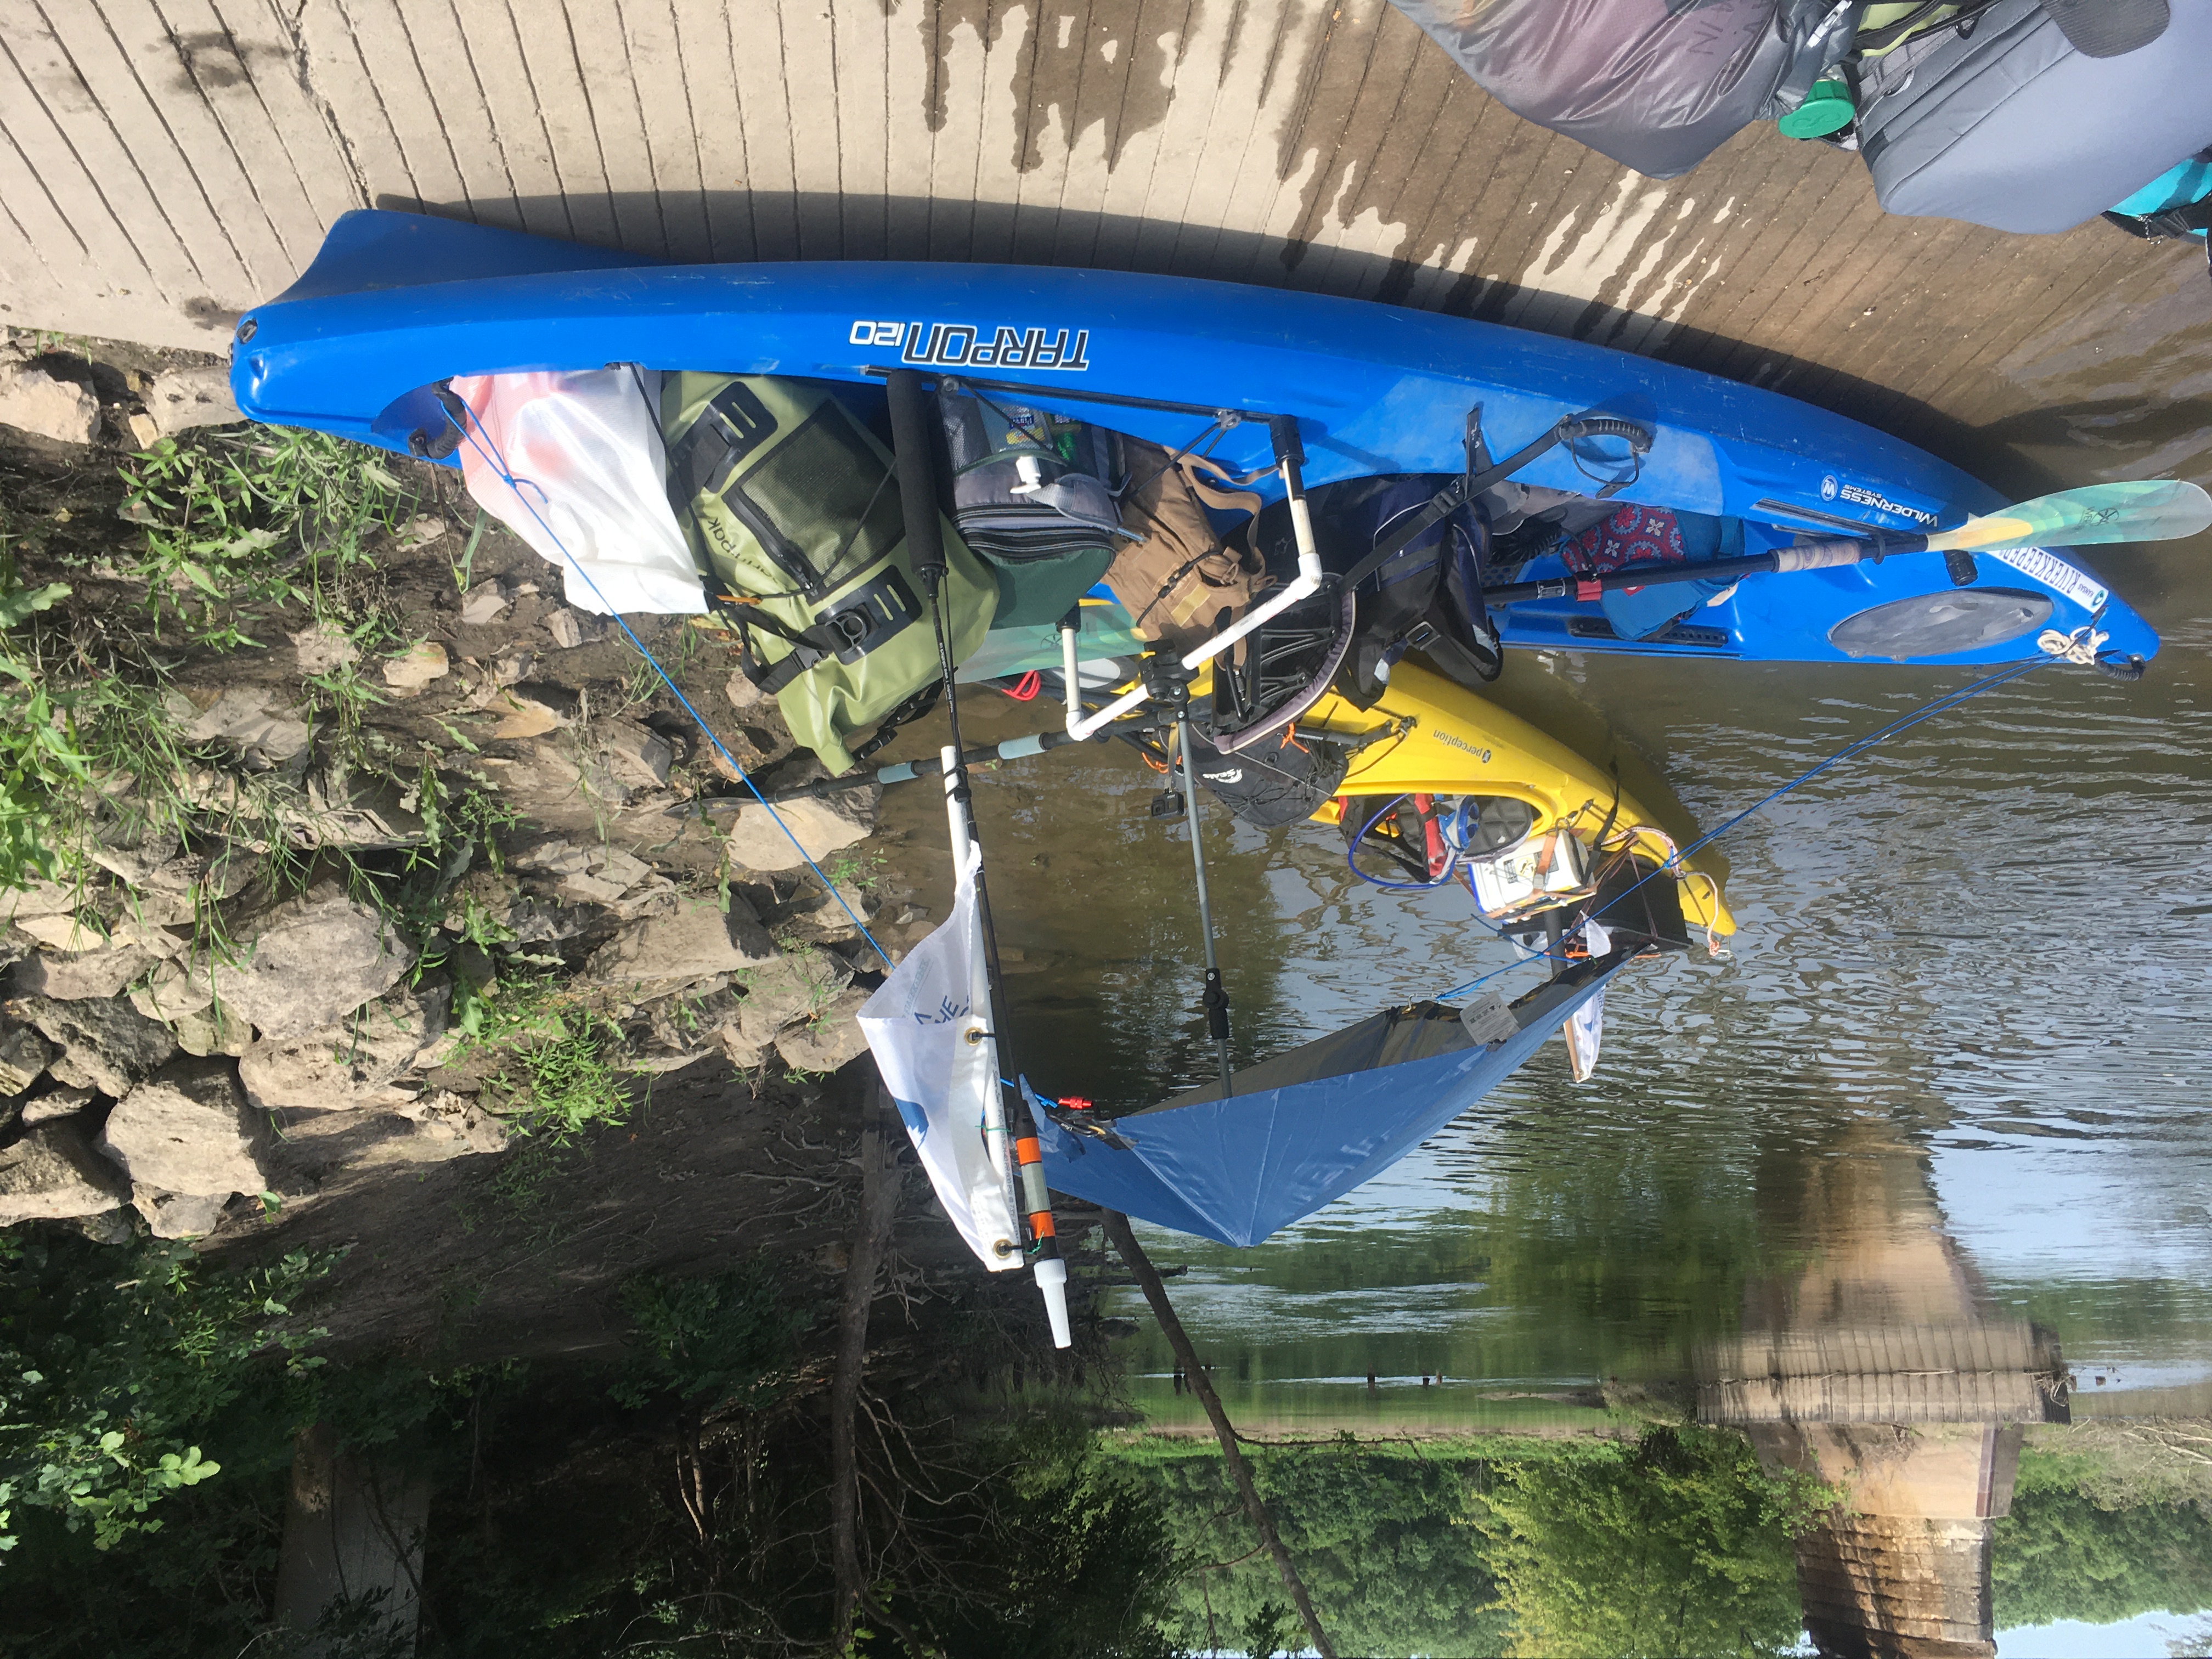
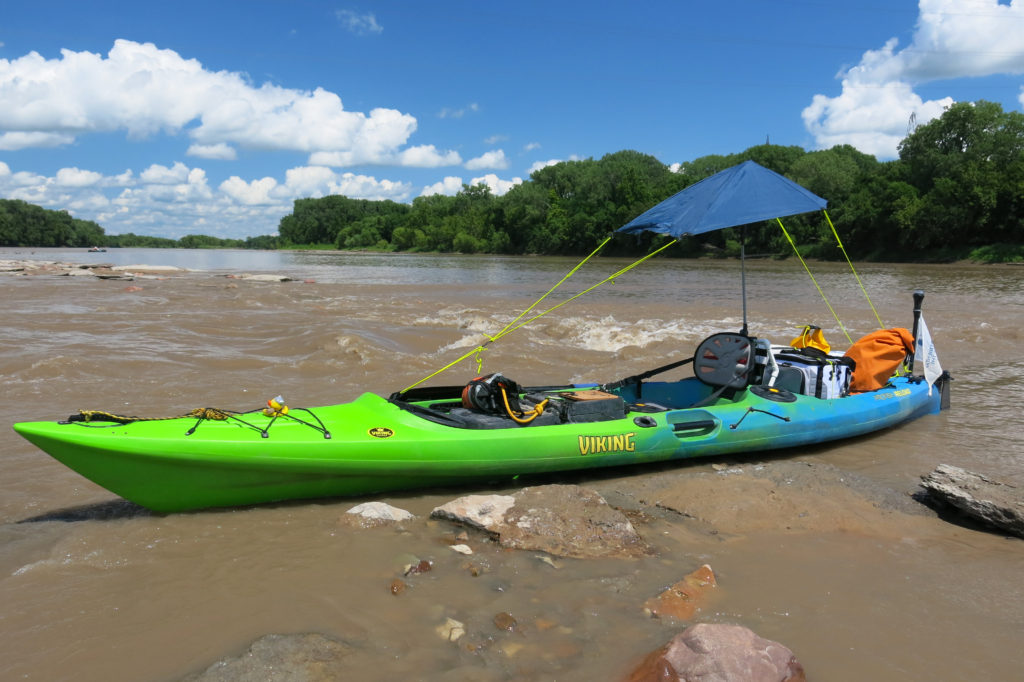
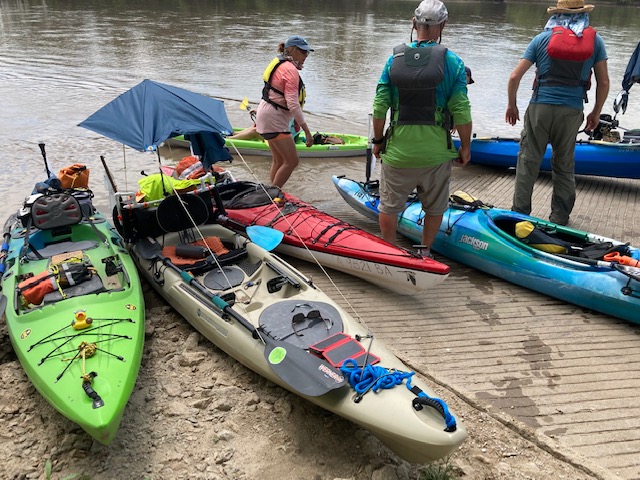
We’ve had lots of conversations about our KAW 173 trip from Junction City to Kansas City this summer; about ramp accommodations, kayak lockers, sandbar camping, eagles and more. One piece of equipment that many people have asked about is the sun shades on several of our kayaks. They made a noticeable difference as we paddled on hot days.

The umbrellas are Versa-brellas from Sport-brella. They are simple sunshades with a couple of really nifty features for this application: a pivot just below the skirt that allows the top of the umbrella to be adjusted side-to-side without moving the rest of the shaft, and an off-center skirt that provides shade without a lot of extra fabric to catch wind and get in the way. They are about $20.
Out of the box, this umbrella is a little too sail-like for use on a kayak. Fortunately, Greg Z. spent this spring experimenting with mountings, rigging and modifications to get ready for our summer river trip.
Mounting
The most important consideration is how to mount the umbrella to your boat. The bottom of the umbrella shaft has a clamp that will fit a 1/2 to 3/4″ PVC pipe. So all you have to do is find a way to mount a section of pipe the proper distance behind the paddler and the proper height above the deck! Easy, right?
Put on your life jacket and paddling hat, sit in your boat, and have your assistant hold the umbrella at a place where you can reach the clamp to raise and lower the umbrella, but not so close as to interfere with your paddling or comfort. The umbrella should be at a height where you can reach (behind you, over your shoulders) the pivot to adjust the angle, but high enough that the skirt doesn’t unnecessarily block your view. This is how you find the perfect position for the PVC mounting crossbar.
There’s nothing that prevents using a socket mount, but a pipe oriented across the kayak (athwart, as they say) allows the umbrella to be folded flat along the deck behind the paddler. The next part depends on your kayak, and all we can do is show some ideas. The crossbar is held in place by risers attached to the kayak. Rod holders, rail sockets, and cockpit mounts are all possibilities for this attachment.
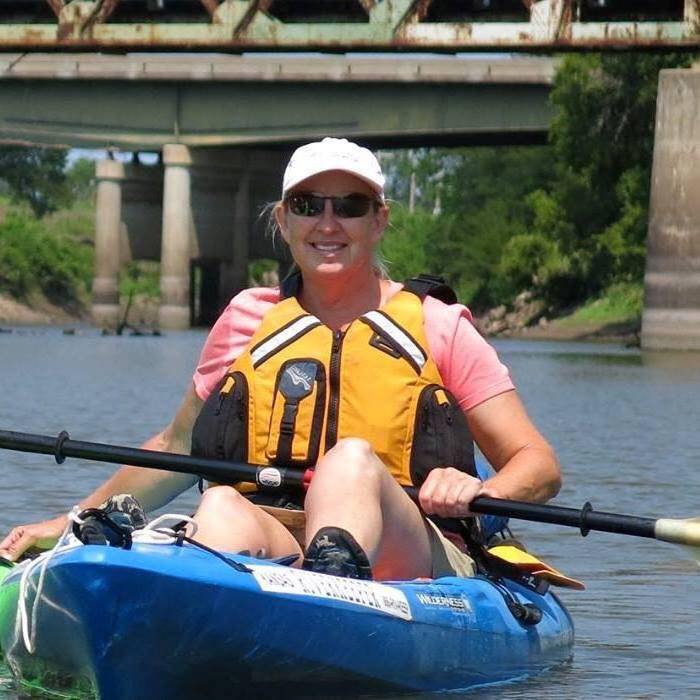
Pictured above is Dawn’s boat that has gear rails. Two Scotty Gearhead Track Adapters hold the vertical risers, with 90-degree elbows to hold the crosspiece.
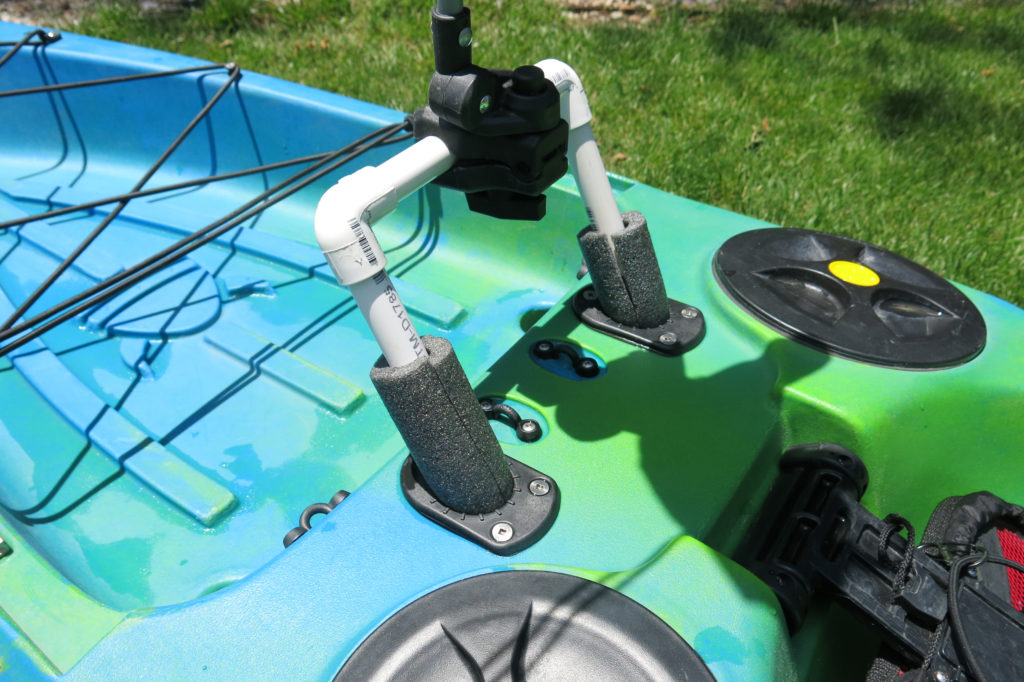
Pictured above is Greg’s boat that has built-in rod holders behind the seat. Pipe insulation tightens the fit for the risers. Because of the angle of the rod holders, this mount needs a couple of 45-degree elbows to get the crosspiece to the right place.

Pictured above is Marcia’s sit-in kayak. Her mount is a A-shaped base that sits on the floor behind the seat, with risers that come up behind the seat, and a few extra joints to bring the crosspiece to the proper location. This is not glued, it would never come out if it were.
Pictured above is Steve’s umbrella mount which is the same as Dawn’s, with additional PVC stubs for storing the wheels for his kayak cart.
Modification
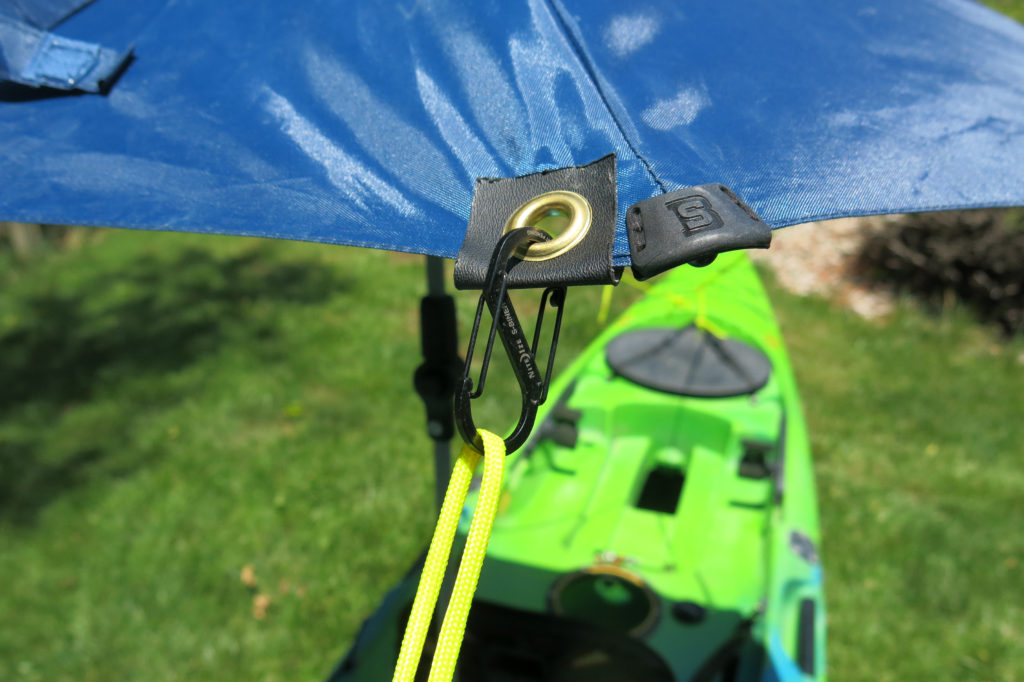
This umbrella will be tied-off to the kayak for stability in the wind. Grommets and reinforcing patches at each outside corner of the front (long) and rear (short) skirt section will provide anchor points. The front edge tends to flap in the wind and hangs down across the paddlers view in a headwind. The view problem can be addressed by the height of the mount, and by reinforcing the front edge with light wire and waterproof tape (gorilla tape, or similar) a slight peak can be formed that fixes the flapping and gives a better front view without raising the rest of the shade.
Rigging
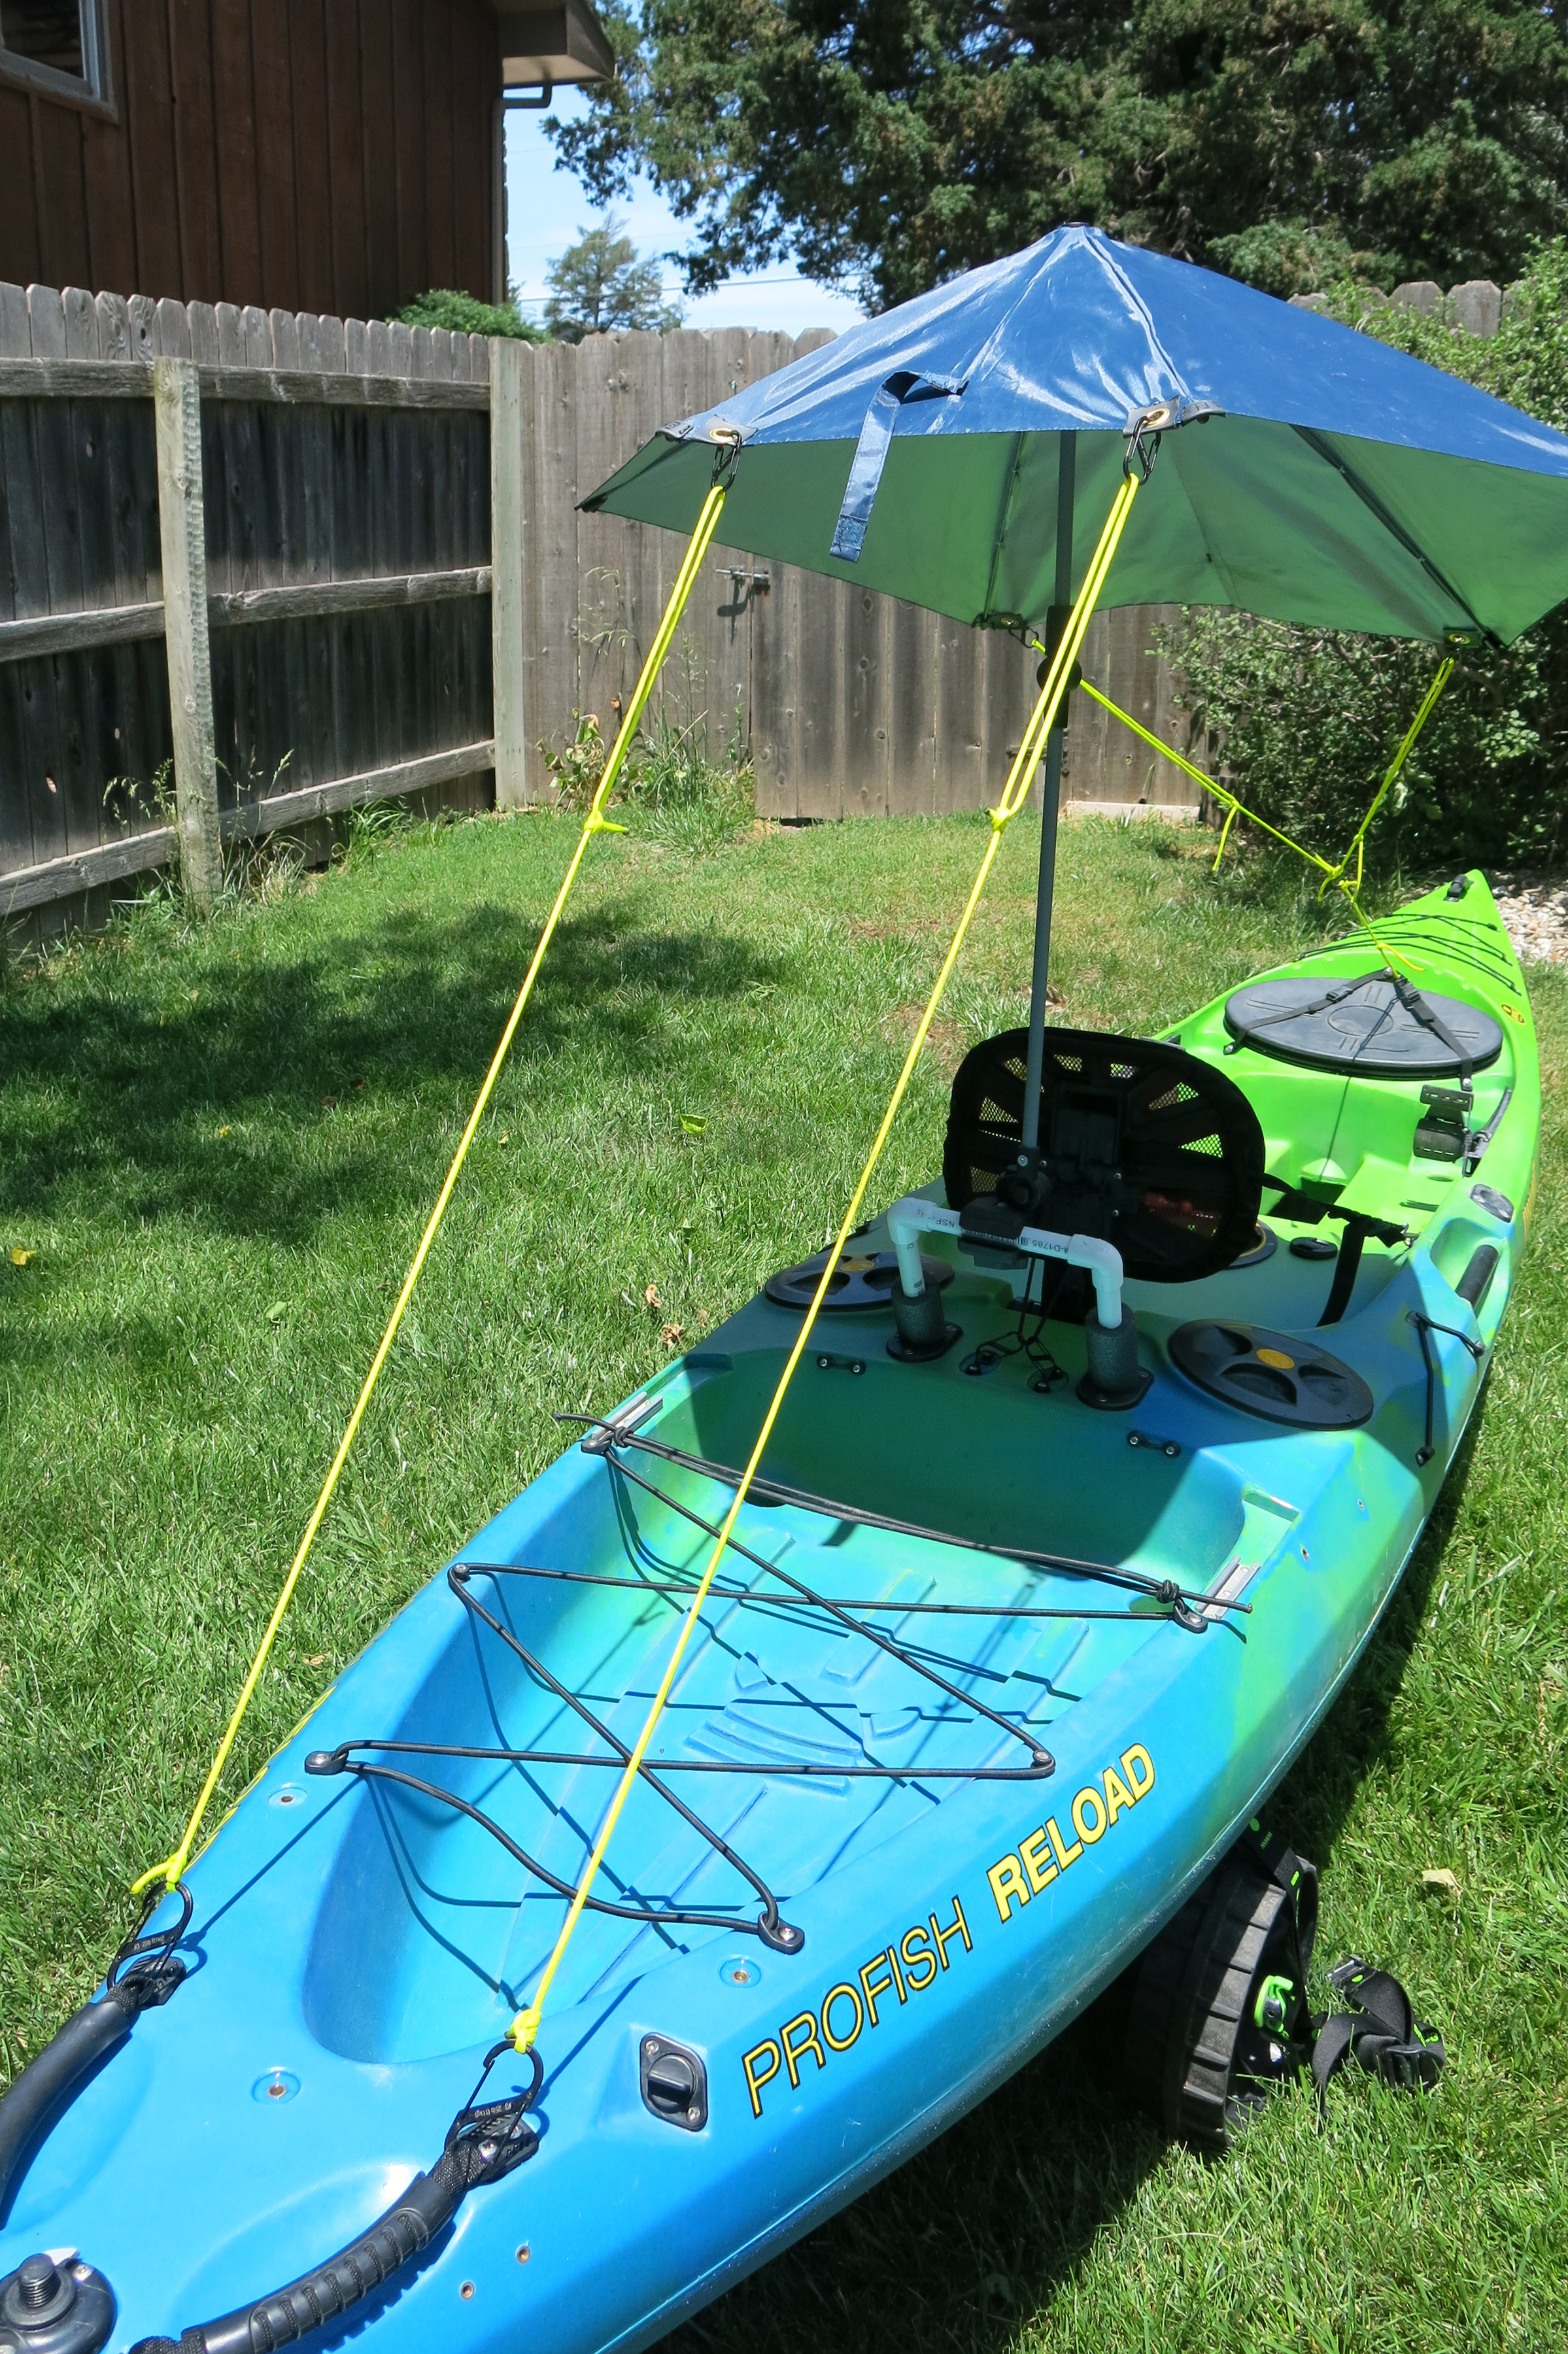
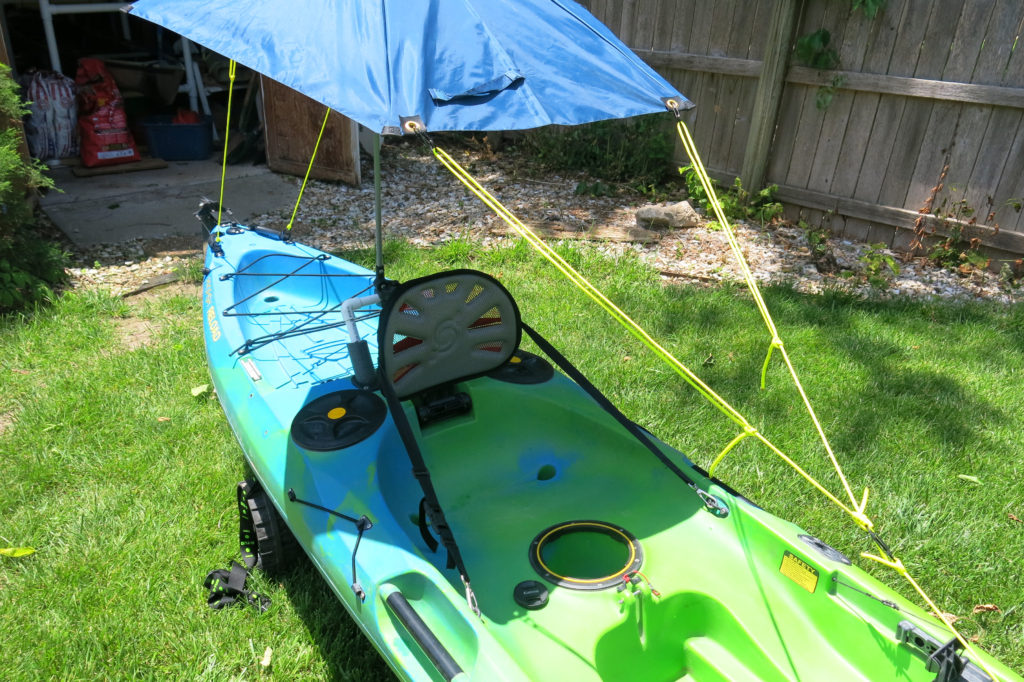
The corners of the umbrella skirt with grommets will be tied fore and aft to convenient points on the kayak. This works best with longer lines, but those might get in the way of your deck gear. Among our kayaks, Greg has tried several options; one line per corner to the ends of the boat, short lines at each corner coming together in a ‘Y’ and continuing to the kayak as a single line, short lines going to deck tie-downs.
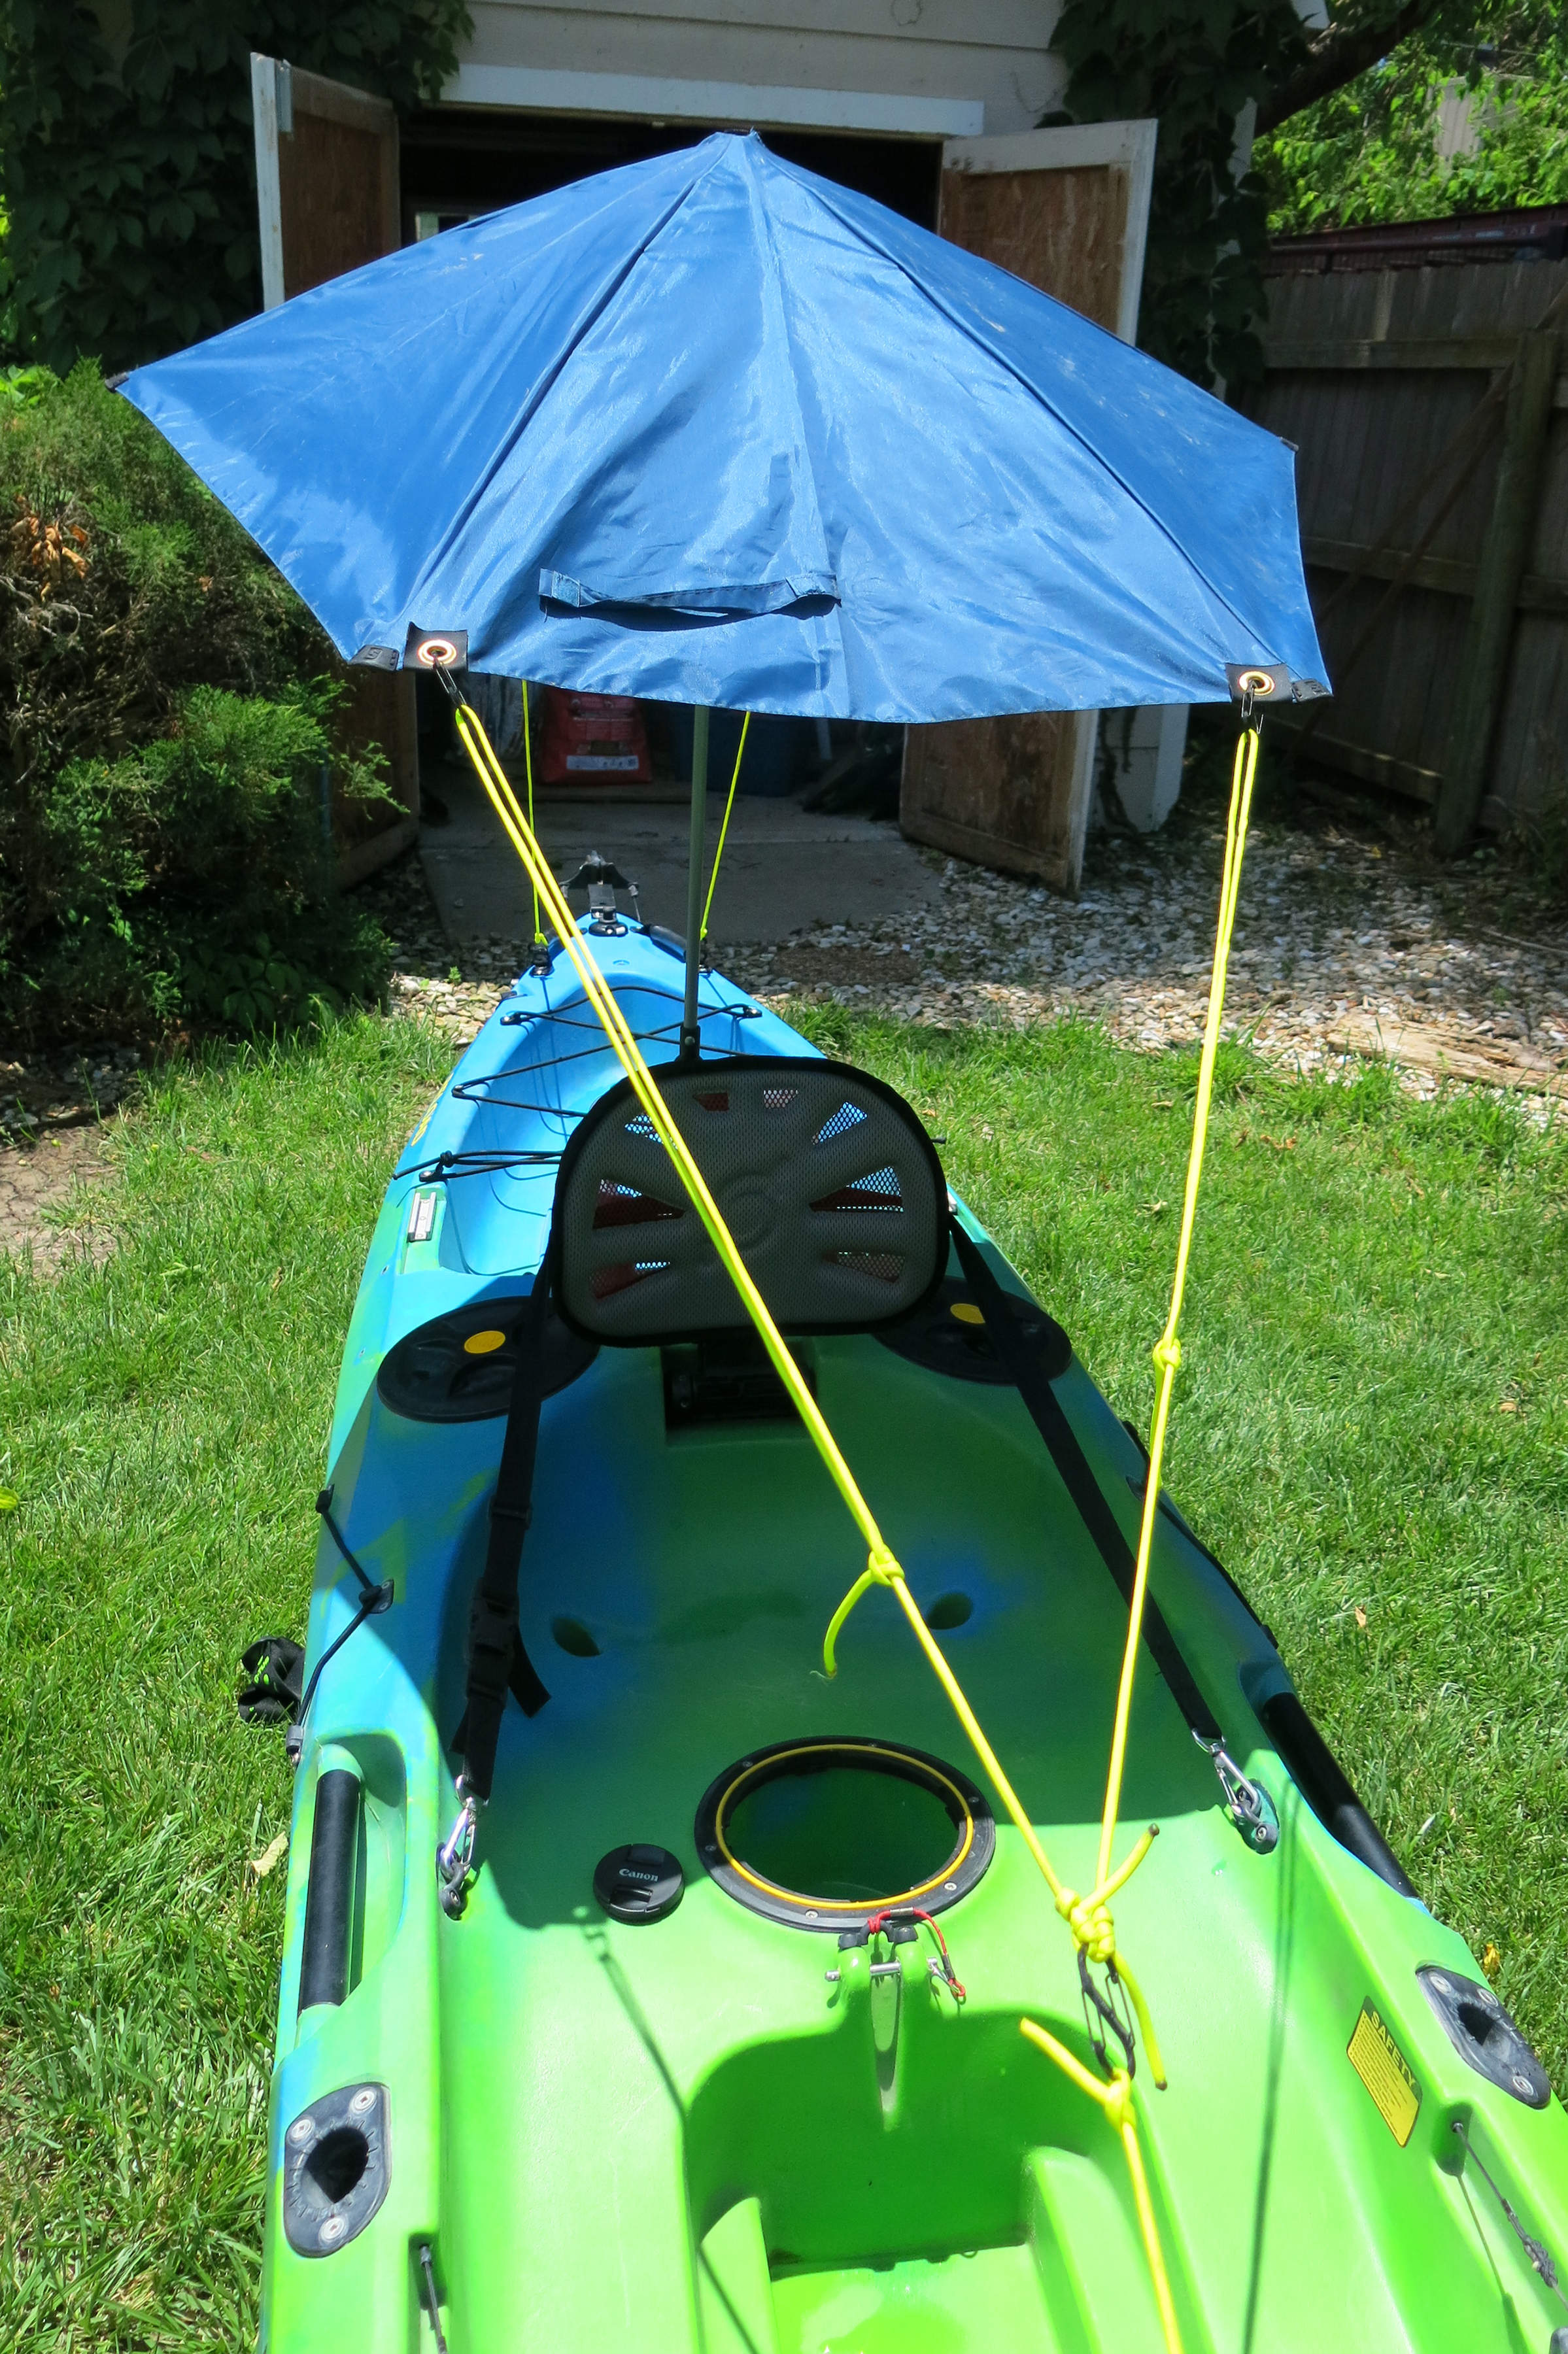
The rope for these lines should be fairly fine, like a light-duty paracord or 3/16″ braided poly rope.
If you use a ‘Y’ for the front rigging, try to keep the knot low enough that it’s not directly in your preferred line of sight. It’s a little easier to keep dual front lines to the side.
Conversely, if you use a ‘Y’ for the rear rigging, try to keep the knot high. The umbrella skirt pivots near the top and if the legs of the ‘Y’ are too long then one line will be slack when the umbrella is tipped to the side. Ideally, the ‘Y’ and the pivot are aligned.
The lines are attached to the umbrella with carabiners (as is everything on the modern kayak) for convenience – the rear lines could be tied, but the front lines will be detached to lower the umbrella so this should be some kind of quick-connect attachment. Use a slip knot near the carabiners to allow you to adjust tension on the lines as you tilt the umbrella for maximum shade.
Be sure the lines do not interfere with your paddle stroke.
Putting it all together
Install the crossbar using whatever method you have chosen. Clamp the umbrella to the crossbar in the upright position and expand it. Attach the rear lines to the kayak and umbrella and adjust the slipknots so that the skirt is stabilized but not distorted. Attach the front lines to the kayak and umbrella. Adjust the tension on these lines as well.
In a strong wind, or whenever you want to lower the shade, detach the front carabiners, reach up and furl the umbrella, and then lay it back by pushing on the umbrella shaft and rotating on the PVC crosspiece to stow it on the deck behind you.
From the stowed position, reach back and bring the umbrella shaft to the upright position by rotating the clamp on the PVC crosspiece. Unfurl the umbrella, you might have to duck forward a bit to let the skirt get by you. Reach up to lock the umbrella skirt in place, and to adjust the pivot. Then, attach the front carabiners and adjust the tension.
Now you can paddle in shade all day.

 Paddle safely! Use the links below to quickly access information that impacts river conditions.